POV: every time you wear something on camera, the comments ask where it's from. Plot twist: you could be the answer.
If you're wondering how to start a clothing brand, the short version is this: decide what your audience actually wants to wear, choose how it gets made, budget for every cost (not just the shirt), turn the design into a spec a factory can follow, approve samples, then launch a small first run. Every step ends with something you can hold, check or send.
This guide walks through those seven steps for creators, with what each step should produce and the mistakes that cost the most. It works the same if you'd call it a merch line rather than a brand; the difference is mostly how far you take it.
This is what we do at My Selection: we help creators develop products and work with factories. If you'd rather talk your idea through with a team, tell us about your clothing idea.
In this guide:
- The 7 steps at a glance
- Steps 1–7, each with a deliverable and the usual traps
- Checkpoints before you spend the big money
- FAQ
How to start a clothing brand: the 7 steps at a glance
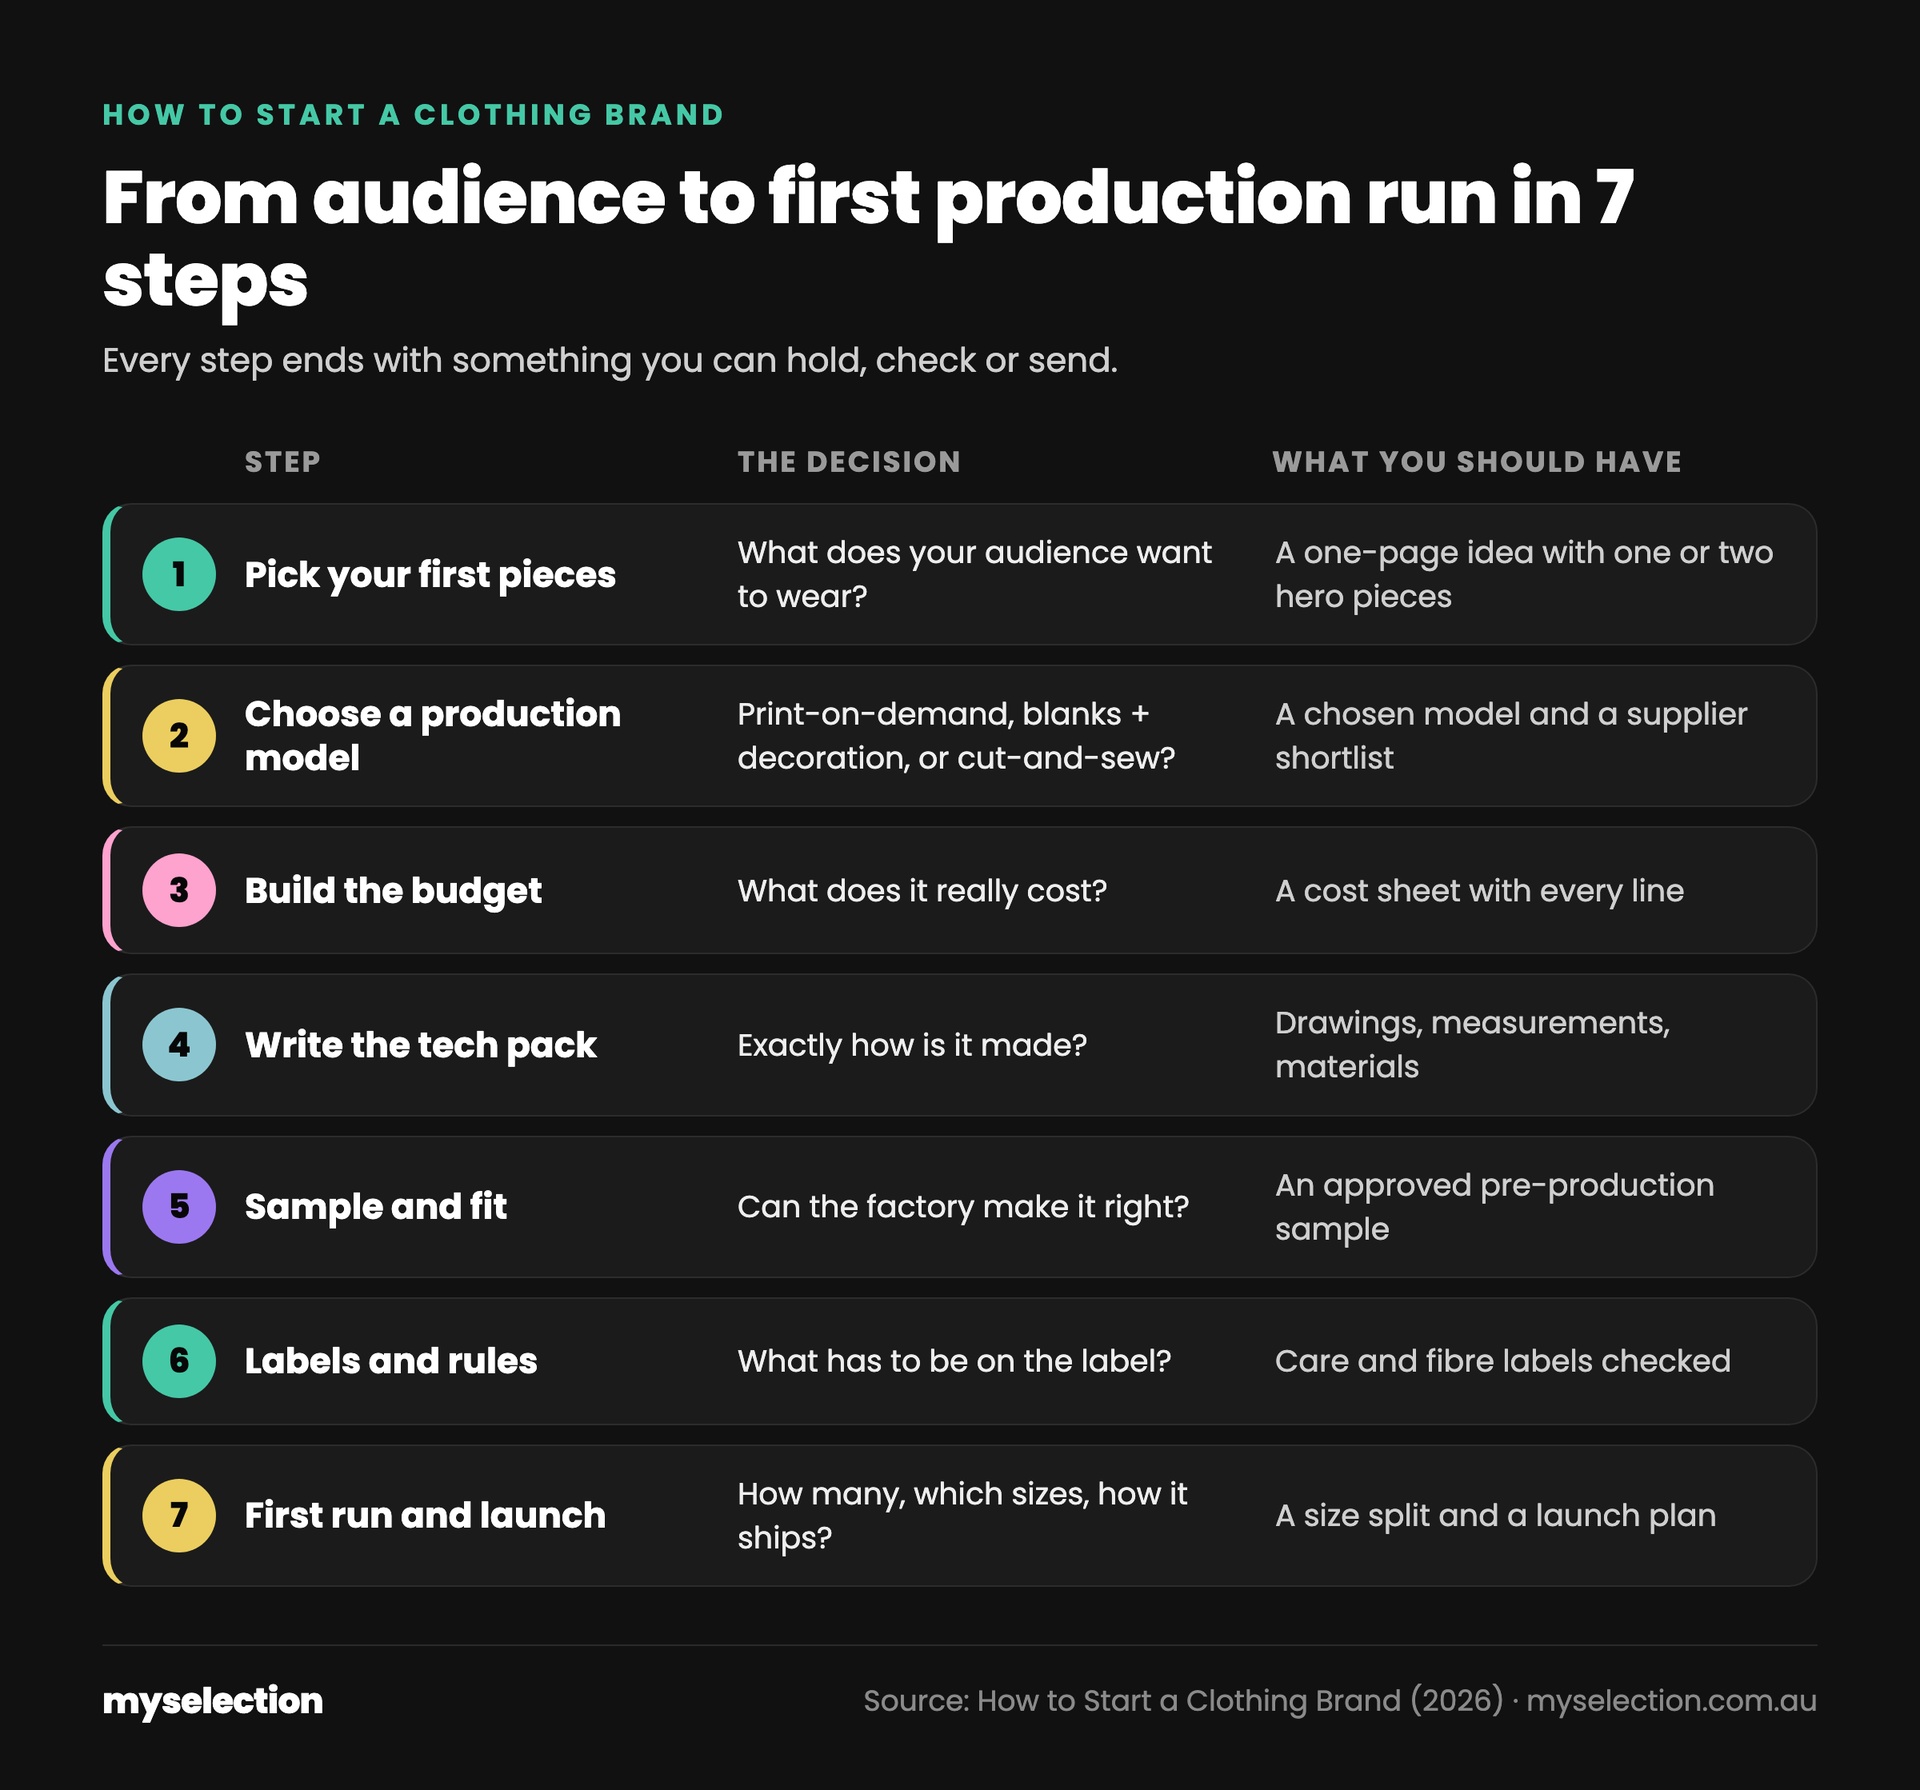
Seven steps from audience to first run. Free to share with a link back to this guide.
| Step | The decision | What you should have |
|---|---|---|
| 1. Pick your first pieces | What does your audience want to wear? | A one-page idea with one or two hero pieces |
| 2. Choose a production model | Print-on-demand, blanks + decoration, or cut-and-sew? | A chosen model and a supplier shortlist |
| 3. Build the budget | What does it really cost? | A cost sheet with every line |
| 4. Write the tech pack | Exactly how is it made? | Drawings, measurements, materials |
| 5. Sample and fit | Can the factory make it right? | An approved pre-production sample |
| 6. Labels and rules | What has to be on the label? | Care and fibre labels checked |
| 7. First run and launch | How many, which sizes, how it ships? | A size split and a launch plan |
Step 1: Decide what your audience actually wants to wear
Start with evidence, not vibes. Look for things people already ask for without being prompted: the jacket in your thumbnails, an inside joke your community repeats, the gear you use in every video. A poll or a waitlist adds proof; a "would you buy this?" story with a link to sign up tells you far more than likes.
Then cut. A common first mistake is launching too many pieces. Each extra style multiplies sizes, colours, minimums and samples. One or two hero pieces done well beat twelve that are fine.
Deliverable: a one-page idea. Who it's for, the one or two pieces, the look and feel (two or three reference photos), and the price you think your audience would pay.
Common trap: designing what you like to wear rather than what your audience associates with you.
Step 2: Choose a production model
There are three common ways to make clothing, and they suit different stages.
| Model | How it works | Good for | Watch out for |
|---|---|---|---|
| Print-on-demand (POD) | A provider prints your design on their blank garment when each order arrives | Testing designs with no stock | Limited garments and finishes, less margin per item |
| Blanks + decoration | You buy existing blank garments and have them printed or embroidered in bulk | A first drop with proven designs | You hold stock, and blanks limit fit and fabric |
| Cut-and-sew | A factory makes the garment from your own pattern, fabric and trims | A brand with its own fit and feel | Minimums, more samples, more upfront cash |
POD services such as Printful are a reasonable way to test whether designs sell before you buy stock. Creator brands often start with POD or blanks, then move their best sellers into cut-and-sew once demand is clear. Our guide on how to make merch compares the three models in more detail, including who each one fits.
If you go the cut-and-sew route and want a team to handle development and factory work, you can see what's included in each My Selection development package.
Deliverable: the model you're starting with, and a shortlist of two or three suppliers that already make your kind of garment.
Common trap: picking cut-and-sew for a first drop before you know which designs sell.
Step 3: Build the budget before you design
The garment is the cost everyone sees. The cost that hurts is everything else: samples, decoration, labels, packaging, freight, duties, inspection, fulfilment and returns. Write all of those on one sheet before you fall in love with a design.
Budget inputs to list:
- Development: design work, tech pack, pattern making
- Samples: each round, plus shipping each sample to you
- Production: unit price at your quantity
- Decoration: printing, embroidery, custom labels or tags
- Packaging: polybags, swing tags, mailers
- Getting it to you: freight, insurance, duties and taxes
- Checks: inspection before the goods ship
- Selling: platform and payment fees, fulfilment, returns
One honest rule: real spend is the unit price multiplied by the number of attempts. A second sample round, a reprint or a fit fix costs money and time again. Our guide to how much it costs to make merch has a fill-in cost sheet and an illustrative example.
Deliverable: a cost sheet with every line, and a target cost per sellable unit that still works at your planned price.
Common trap: budgeting only the unit price, then finding the margin gone once freight and fees land.
Step 4: Turn the design into a tech pack
Factories can't price a mood board. A tech pack spells out the garment: flat drawings, a measurement chart with tolerances, fabric, trims, colours, stitching, branding and packaging. For POD or blanks you need far less, mainly print files, placement and size.
The difference between a spec that gets you the right sample and one that gets you a surprise:
| Vague | Factory-ready (illustrative example) |
|---|---|
| Heavy hoodie | 80% cotton / 20% polyester fleece, 400 gsm |
| Boxy fit | Body length 68 cm, chest 60 cm measured flat, tolerance ±1 cm (size M) |
| Logo on the chest | Embroidery, 7 cm wide, left chest, 18 cm below shoulder seam |
| Washed black | Colour standard approved against a physical swatch |
Those numbers are made up for the example. Yours should come from a garment you already like, measured flat.
Deliverable: a tech pack you could send to two factories and get quotes that compare like for like.
Common trap: sending pretty renders with no measurements, then arguing about a sample nobody specified.
Step 5: Sample, fit and approve
Expect more than one sample. Clothing usually goes through a few checkpoints before production, and each one answers a different question.
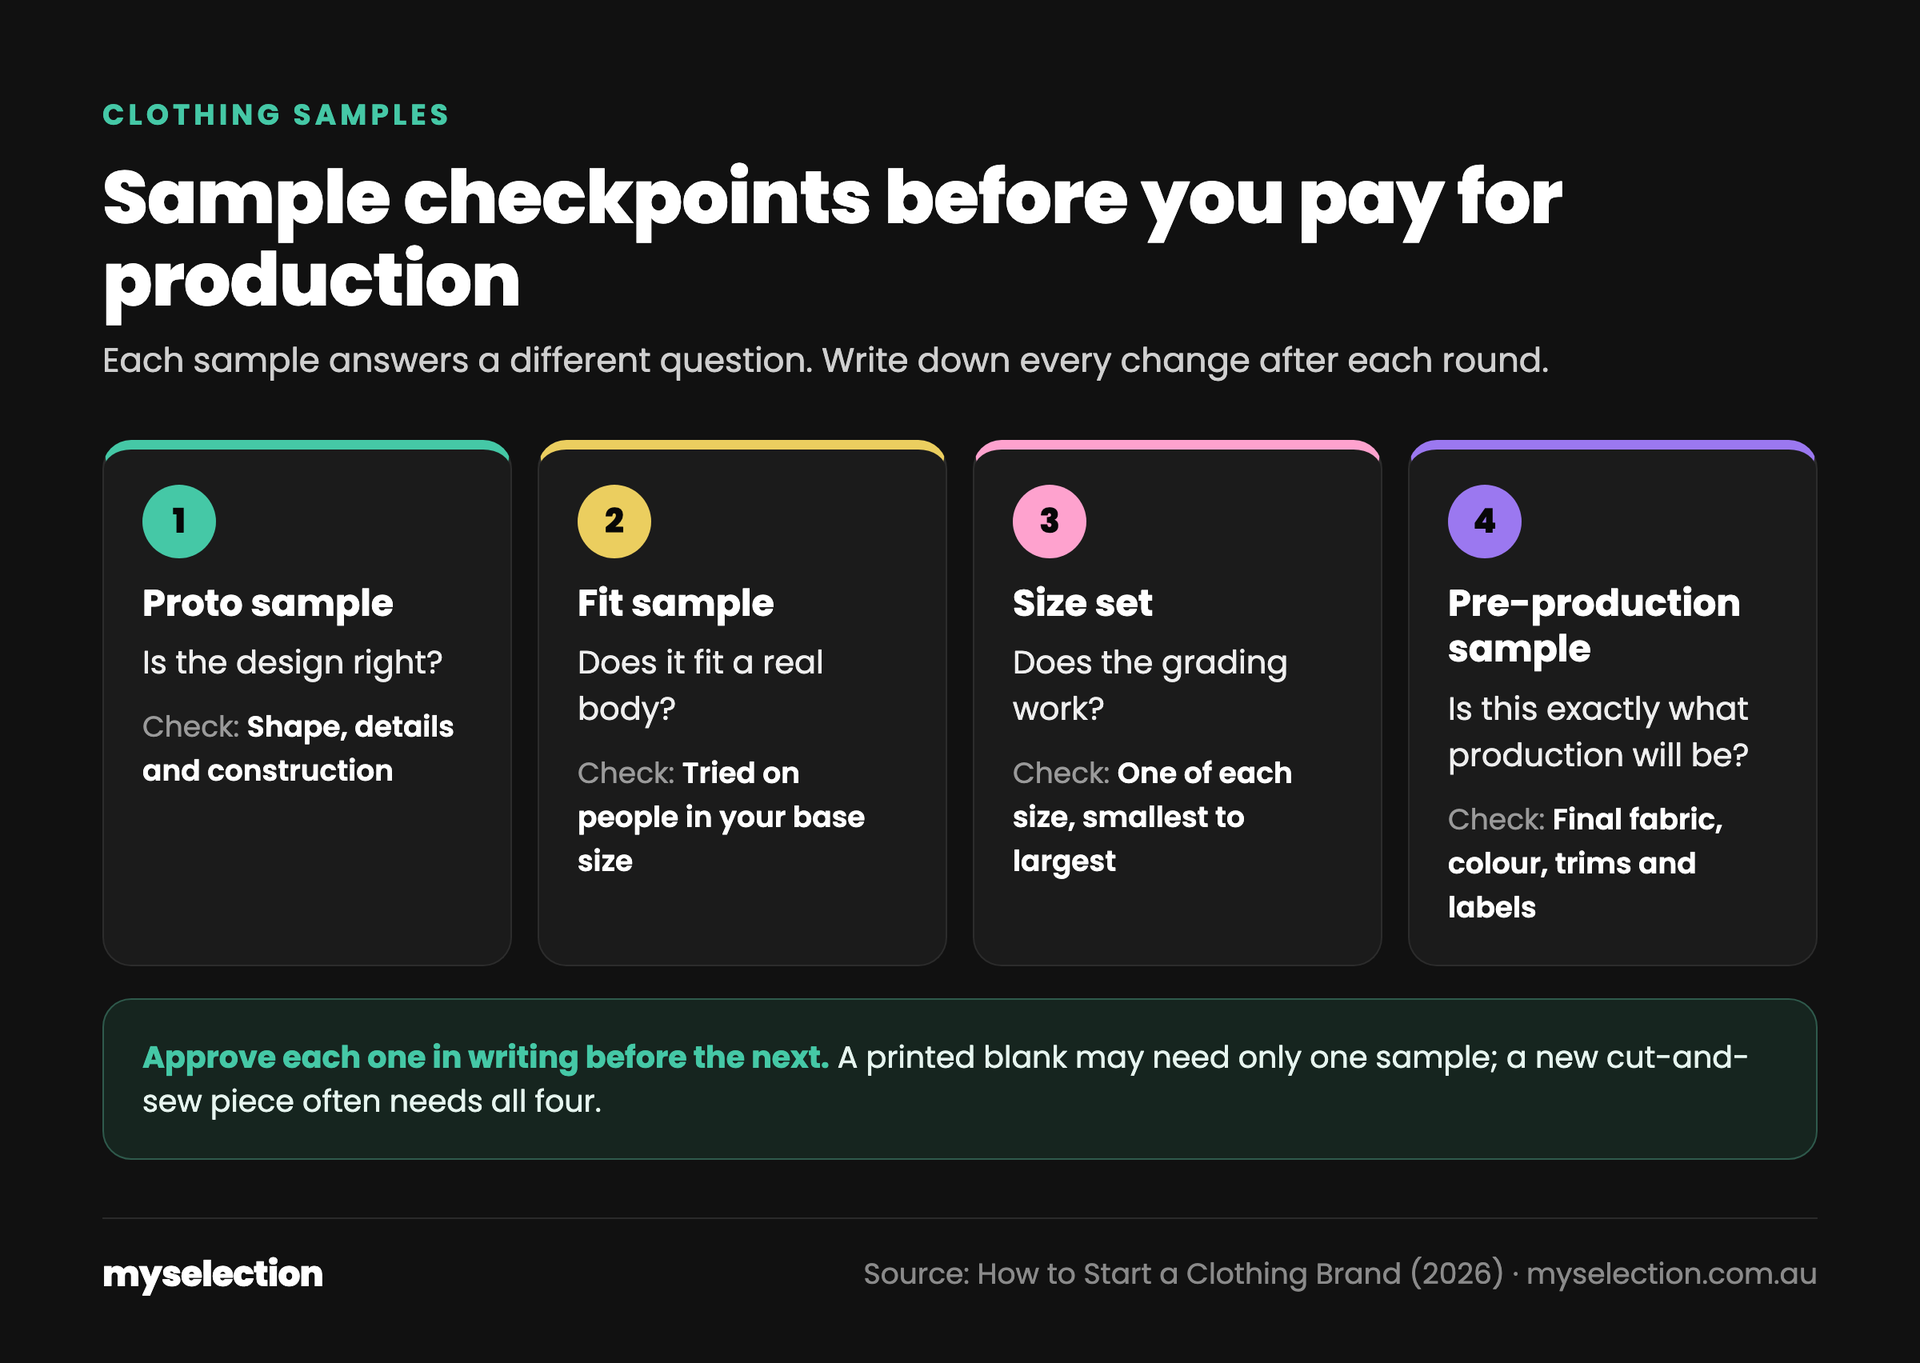
Approve each sample in writing before moving on. Not every product needs every checkpoint.
- Proto sample: is the design right? Shape, details and construction.
- Fit sample: try it on real people in your base size, not a hanger.
- Size set: one of each size, to check the grading works from smallest to largest.
- Pre-production sample: the final fabric, colour, trims and labels. This is what production gets compared against.
Not every product needs all four. A printed blank may only need one decorated sample; a new cut-and-sew piece often needs them all. Write down every change after each round so nobody works from an old version.
Deliverable: an approved pre-production sample and the written list of changes it reflects.
Common trap: approving a sample over a video call instead of trying it on in person.
Step 6: Labels, compliance and the boring stuff
Clothing labels aren't just branding. Many markets have rules about fibre content, care instructions and origin, and they differ by where you sell. Two official examples: the US Federal Trade Commission's guide to textile labeling requirements, and Australia's care labelling mandatory standard. The FTC also publishes a guide to care labeling. Check the rules for each place you'll sell, and ask your factory which tests and labels it can support.
Children's clothing usually carries extra safety rules, so check those before you design anything for kids. Brand names are worth a trademark search before you print them on stock; a qualified professional can tell you what applies to you.
Deliverable: label wording and placement confirmed, and a note of any tests your product needs.
Common trap: treating the label as an afterthought and reprinting it after production.
Step 7: Plan the first run and launch
Now the numbers get real. Ask what the minimum order applies to (per style, per colour or per size), because the same number can mean very different things. Our MOQ guide explains how minimums change your cost per unit.
Don't order the same quantity of every size. Use what you know about your audience, past POD sales or a pre-order to set the split, and keep the first run small enough that a slow size doesn't trap your cash.
Decide how orders will ship before stock arrives: from your place, a fulfilment partner or the POD provider. Then plan the launch like content: a teaser, a behind-the-scenes sample video, a drop date. Announce dates only once production terms are agreed in writing. Ghosting your audience on a delivery date is worse than a later date.
Deliverable: a size split, a confirmed production order, a fulfilment plan and a launch date.
Common trap: announcing a drop date before the production order is confirmed.
Checkpoints before you spend the big money
Before you pay for production, you should be able to say yes to each of these:
- People asked for this, and you have proof (comments, a poll, a waitlist or POD sales)
- Your cost sheet includes every line and still leaves margin at your price
- You've approved a pre-production sample, in writing
- Labels and any required tests are confirmed for where you sell
- You know who owns the design files and patterns under your agreement
- You have a fulfilment plan and a realistic launch date
If any answer is "kind of", that's the step to finish first.
The bottom line
Starting a clothing brand isn't one big leap. It's seven small decisions, each with something to show for it. Start with one or two pieces your audience already asks for, test cheaply if you can, budget every line, and don't pay for production until the sample is right.
FAQ
How much money do you need to start a clothing brand? It depends on the production model. Print-on-demand needs very little upfront because nothing is made until an order arrives. Blanks plus decoration means buying stock, and cut-and-sew adds development, samples and higher minimums. Build a cost sheet for your chosen model rather than trusting a single number from the internet.
Can I start a clothing brand with no money? You can start with very little by using print-on-demand, since you don't buy inventory. You'll still pay for samples to check quality, and your margin per item is usually lower. Many brands use POD to prove demand, then reinvest in bulk runs.
What's the difference between a merch line and a clothing brand? Mostly ambition and control. Merch usually means your designs on existing garments, sold to your audience. A clothing brand usually means your own fits, fabrics and labels, sold to people beyond your audience too. The steps are the same; a brand just goes deeper on steps 4 and 5.
Do I need a trademark to start a clothing brand? You don't need one to start selling, but searching and protecting your brand name before you print it on stock can save a painful rename later. Rules differ by country, so check with a qualified professional.
Discuss your product idea
Got a clothing idea your audience keeps asking for? Discuss your product idea with us, and we'll help you work out the right production model and what to do next.
You don't need to be a fashion designer to start a clothing brand, but you do need people who know the parts you don't. My Selection helps creators turn an audience into a clothing or product brand: shaping the brief, developing the design and working with factories. We work with long-term partner factories in Jiangsu, Zhejiang and the Pearl River Delta and have our own development team in China. Our supplier network covers 867 suppliers across 34 countries, and our team includes 10+ designers.
Which garments fit, what quantities make sense and what's included are confirmed per project. Lead times, MOQs and unit costs depend on the product, so we confirm those too.